"Let's start at the very beginning, a very good place to start ..."
When I think back to the beginning for me with cooking, it goes back to memories of food. My mom's spaghetti sauce that she would cook all day on the stovetop and the smell permeated the entire house. When I would get home from school I would be so excited because I could smell it and knew what was for dinner! My Nana's chocolate chip cookies. For some reason they have such a DISTINCT taste and whenever I eat one I am instantly transported to being 6 and playing at their house, especially with her organ. Neopolitan ice cream - it is one of my faves and has been since I was a kid. When I think of the beginning with food, I think of the basics, the originals, the staples that you cannot do without. For me, it is bread. When I think of bread making, I actually think of buns, the ones my Mother-in-law taught me how to make. It is more than just a recipe, it is a tradition. All of her sisters make the same buns, they all learned from their mom, who learned from her mom. It is a family legacy, passed and and lovingly taught to each person. It is something I cherish, being included in this tradition. It is something I cannot wait to teach my girls and future daughter-in-law, to watch them make them in their own home and share with their families.
So, if we are starting at the beginning, that is where I plan to start.
I will be using my Kitchen-Aid as I am still Bosch-less, but only until Christmas :) I figure I have earned my Bosch and plan to christen it with a batch of these babies!!! Anyway, I digress ....
I am going to give you the recipe for the full 4-6 dozen but the pictures you see are with a modified smaller recipe for my kitchen aid since it will not quite hold the whole lot. You can also make these by hand, for you ultra keeners!
4 c warm milk
3/4 sugar
8 tsp yeast
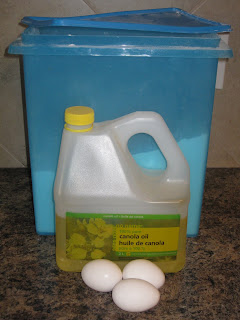
4 eggs
5 c flour
1 c oil
4 tsp salt
5-7 c more flour
The First Line Players
Mix your warm milk, sugar and yeast in the bowl of your mixer or the bowl you are using. Let stand until it looks like this:
Next
Mix in beaten eggs and the first addition of flour. mix until incorporated. Let sit until bubbles begin to form on the top like this:
Add the oil, salt and mix. Slowly add the flour, one cup at a time until it forms an elastic dough which stick to both the sides of the bowl and the dough hook. It will be sticky but not gluey and gloppy. You should be able to touch it and it sticks to your finger but if you pull back it will break and not form a massive string between your finger and the dough. Usually this happens around 5.5-6 cups ....
Coat inside of a large bowl with oil and transfer dough, forming a large ball. Cover with a tea towel and put in a warm place to rise. In the summer that is my kitchen table but in the winter when it is cold, I usually start the oven to the lowest temp (170F on my oven) and as soon as it comes to temp I turn it off and put the bowl in there to rise. Let rise 1 hr until doubled in size
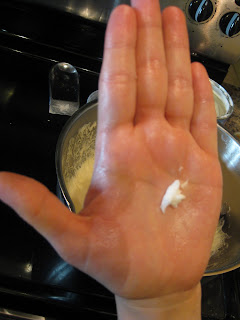
Punch down dough. Coat your hands in some shortening. You will need to do this continually as you make the buns so your hands don't stick and you get a nice smooth bun.
About this size and rub it on both palms
Cut off a piece of dough about the size of a small apple
Take the dough with both hands and coat it with the shortening and pull it sideways to stretch it slightly
Next form a backward "C" with your right hand. take dough with other hand and push through the "C", stuffing dough inside itself.
Pinch bottom of newly formed bun and fold over any excess underneath. Place on shortening greased cookie sheet fairly close together.
Let rise 45-1 hour. You can brush with melted butter at this point, although I usually forget and just skip straight to baking - bake at 350F for 20 minutes until golden and shiny on top.
Eat warm with honey butter ..... it is like comfort in a bite!


No comments:
Post a Comment